
Steps to follow:
- Open a new flash file (Ctrl+N).
New Document window will appear
Select General panel and choose Type: Flash Document . Press OK. - If your timeline window is not open, press (Ctrl+Alt+T).
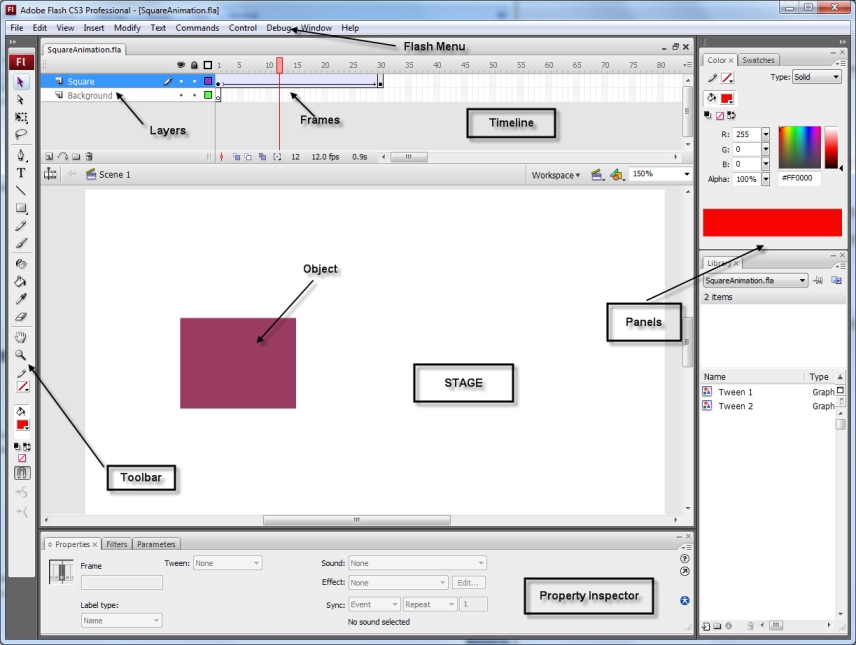
- Now you can see a single Layer called "Layer1"
in your timeline Window.
- Title Layer 1, "Ball"(click on layer title to change name)
- Select the first frame. Draw your image on the stage; you can either choose Rectangular tool or Oval tool from the tool box and draw your desired shape.
- Select your object on the stage and press
F8 to convert this image to a Symbol (or right click "Convert
to Symbol"). Convert
to Symbol window will pop-up.
Name your Symbol what ever you like.
Select Graphic behavior and press OK. - Your Symbol is in frame1 of Ball layer. Select frame 20 and press F5 to insert a new Frame (or right click "Frame")
- Select any frame between, 2 to 19, then right click select "Motion Tween". Now your Layer will look something like the one shown below.
- Still keeping playhead on frame 20, move your
Symbol to any other position other than the present one. A key frame will magically appear on the timeline to indicate a change in movement.
- Now press (Ctrl+Enter) to view your motion tween.


/cdn.vox-cdn.com/uploads/chorus_image/image/47070706/google2.0.0.jpg)

.gif)


