Wednesday, September 30, 2015

Illustrator Drawing Assignment: Dog, Cat, Bird

Use your new pen tool skills to trace a simple Illustrator. Choose one of the images.
10s select your own, but keep it fairly simple.
  1. Open a new Illustrator document.
  2. Then >file >place one of these simple images to your document
  3. Add a New Layer. from pop-down window on the layer pallet.
  4. Start drawing your image using the pen tool.
  5. Add your own final touches.


Monday, September 21, 2015

10s- Morphing a Letter


Direct Selection Tool
  1. Choose a letter simple sans serif font first Letter of your first name, or last name.
  2. Then make the letter a graphic object by:
  3. SELECT the letter with the SELECTION TOOL.
  4. Then go to OBJECT> CREATE OUTLINES, ~or EXPAND.
  5. Use the DIRECT SELECTION TOOL to reform the letter style. Click on points to re-shape10 times to create another shape/image.
  6. With each reformation, save the change and then select the form, 
  7. COPY and PASTE the new shape to make the next change 
  8. Make 10+ variations of the letter. 
  9. This is a doodling exercise; be creative, and remember to save each different steps.

Wednesday, September 16, 2015

Finish and Post your Banner

After you create a textured text, and you are happy with the overlapping texture, we are going to experiment with the text tool and positive - negative space on your banner.

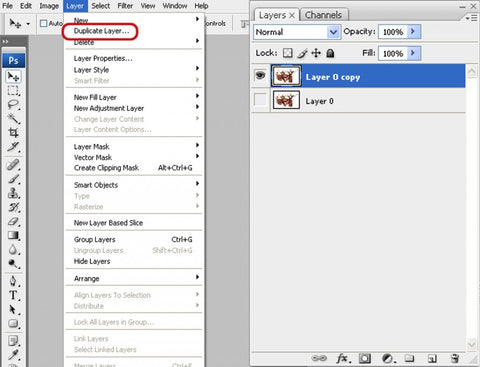
First you have to flatten the image. LAYER>FLATTEN

Select an area with the TYPE TOOL, select the font, size, alignment, etc.  Type your name or the title of your blog with the Horizontal Type Mask, or the Horizontal Type Tool.
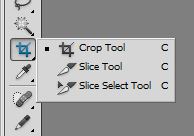
Crop your banner.


When you are satisfied with your design, SAVE AS your file as a  PSD (Photoshop Document).

Use the CROP TOOL to crop the banner to a size that works in Google. WIDTH: 1000px HEIGHT: 120px RESOLUTION: 72dpi in the option bar at the top of the file.

LAYER> FLATTEN your file and then SAVE AS a JPG. (Joint Photographic Experts Group). You cannot post PSDs to your blog. 

Once you are finished, add your banner to your blog. In Settings>Layout>Heading (Edit)> Browse for your file.

Monday, September 14, 2015

More Photoshop Tricks: Adding Filters

So we have created the Wordle with the 100 words about yourself to create your banner. Now we are going to experiment with some filters that may emphasize something about you.
>LAYER> DUPLICATE a layer on your layers pallet.
>SELECT the LAYER where the image that you want to effect is on (it should be highlighted in blue).
> FILTER try/experiment with a filter and see what happens to a new layer each time:
  • Blur-Gaussian Blur
  • Stylize- Find Edges
  • Brush Stroke- Accented Edges
You can use the erase tool to selectively erase part of the effect from your design
OR
> Use the MARQUEE TOOL [top of your tool bar] to SELECT a part of your image that you don't want and DELETE it. [to de-select- SELECT menu bar> DESELECT].
Marquee Tool

experiment, play and have fun...

Friday, September 11, 2015

Photoshop/Wordle Banner

  • We are going to personalize your blog some more. 
  • Using Internet Explorer
  • Open Wordle: http://www.wordle.net/ 
  • Type or copy/paste the write-up about you into the "CREATE".
  • Try different colours, fonts, layouts, arrangements.
[There are other free programs that create a shapes from a word group: http://www.tagxedo.com/ BUT you need a Silverlight for it to run and it won't work for the banner, but it is good to know about. A fun, quick and easy graphic idea organizer. And https://tagul.com/ that you can use a photo for the shape, but you need  to sign in with an account.]
For this assignment, I would rather you start simple with WORDLE.
  • Once you have your Wordle the way you want it, then Save as "PNG" into your file.
  • Then open your Wordle it in Photoshop.
  • Go to the start menu on the lower left side of your screen.
  • Click All Programs> Adobe Design Premium> Adobe Photoshop
  • Open FILE [top left pop down menu]> OPEN> 
  • Fine file in "Computer" > student account/guest account.
  • Open the >WINDOW menu, click on >LAYER to open layer pallet.
  • Open the >LAYER pop down menu on the top of the window> DUPLICATE LAYER.

  • Lower the opacity of the new layer copy.
  • Then use the "MOVE" tool on the tool bar to shift, spin:
You can play with layer styles, colour and filters- experiment, and most of all, have fun!