Friday, October 7, 2016

Self-Portrait Illustration

First consider who you are, different sides, interests, your personality. Then find ideas, images, icons, items that represent various parts of who you are and re-draw them in Adobe Illustrator, add you own style to the objects/symbols.

Next we will take your portrait learn about Editing using Photoshop and cut/paste and draw over top of your portrait. using illustrator, but first we are going to explore the elements of design: lines, shapes, textures, forms, and colour.

Illustrate some of the things that interest you and arrange them in a meaningful way around your portrait so that they look a part of your image. Like they are exploding from you or emitting from your aura. We will learn how to draw swirls, and simple objects using Adobe Illustrator.


Monday, October 3, 2016

Illustrator Mesh Tool Basics

One of the most amazing and confounding tools in Adobe Illustrator is probably the Gradient Mesh tool. Working with this feature allows the user to divide almost any shape into a mesh. Each intersection of two lines (horizontal/vertical) can be colored with a solid color. Practice with the mesh tool so that you can use the Mesh tool better. In this tutorial, we'll show you some tips that will improve your Mesh work.
I would like to thank Itai Lustgarten and "Design Tuts" for writing this tutorial. Itai is a fellow graphic artist, designer and lecturer. We have both been in the industry since 1990. We both teach Illustrator, Photoshop and pre-press procedure in Mentor academy and several academies in Israel.
After selecting a shape (non compound shape, choose Create Gradient Mesh from the object menu. At the command window you can define the structure of the mesh - the number of rows and columns. Notice the mesh lines defined by the original outline of the shape.
1
Another way to add a point to a mesh is by using the Mesh tool and clicking anywhere in the shape's area.
2
After converting a shape into a mesh, you can select points with three tools: Mesh tool, Direct selection tool, and the Lasso tool. All you have to do now to add color to the mesh is select a color from the swatches palette, or use the eye dropper tool to select a color from an image.
3
If you need to move a point on the mesh shape, choose the Mesh tool or the Direct Selection tool, then click on a point and drag it (holding the Shift key will drag the point in a horizontal/vertical line only).
4
In order to achieve the best result with a mesh, one has to use a symmetrical shape since the mesh uses an equal number of anchor points on each side of the shape. The problem is what happens when we want to make a complex shape. Look below at the result of the non-symmetrical shape versus a symmetrical shape.
The solution could be split into two parts. The first one is to start with a rectangle or an ellipse, convert them into a mesh and then distort them to the shape we want. The second solution is to work with multi-parts, which are symmetrical shapes - one on top of the other.


5
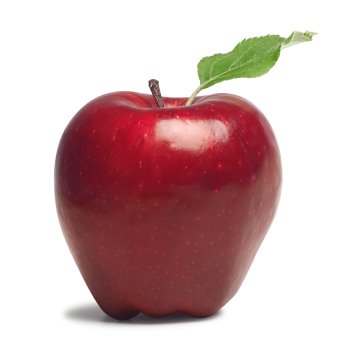
Gradient Mesh Assignment: Select one of the images saved to the share folder. Beginners select either the apple, yellow pepper, or the pumpkin. More advanced students select more complex images to mesh- Old telephone, sports car, army boot. Make sure to File> Place the image onto Illustrator and turn the image into a Template and then add a layer to draw onto. Envision each separate area as different shapes.

Drawing an Apple with a Gradient Mesh

Learn about tracing with the pen tool, the gradient tool and the mesh tool when drawing in Adobe Illustrator. I have saved an image of an apple in the Share folder for your to insert into a new Illustrator document FILE>PLACE (Do not try to copy & paste). You are to use the gradient mesh tool to draw the apple with shading and highlights as close to the real thing as you can.

Watch this video tutorial, in class to get started. Afterwards. we will slowly go through the steps together:

http://youtu.be/u9f7SOhtUPU
http://youtu.be/K_mEKVsxyrs

Sunday, September 25, 2016

Illustrator: Shape Tool


Practice using the shape tool, pen tool, eye dropper tool (colour), direct selection tool, and layers.  Open one of the animal images from the share folder and then create a new drawing layer to start your own version. Try changing colours to make the animals your own. Add a title

Once you are finished, try drawing your own animal.
Here are a few tutorials to help you-
Shape Tutorial
Illustrator Tutorial

Grade 10s
Try this

Friday, September 23, 2016

Finishing your Shape Animal Illustrator

Once you have completed tracing your owl, dog, cat... Then
Personalize your Critter:
  1. Personalize your critter with swatches, colours, and creative adaptations. [in the swatch panel, there is a hidden menu to the top right of the window- click on the tiny arrow and select Swatch Library> Patterns...] experiment with different pattern and colour swatches.
  2. FILE>SAVE AS your Critter Drawing as a .ai [Adobe Illustrator] file.
  3. FILE>EXPORT> your image as a PNG
  4. Post to your blog. Remember to Title YOUR POST! Critter Drawing or"Owl Drawing".
  5. Write a brief reflection about your illustration.
Background: Next find a simple, but fitting background to place your critter into via Google. Approximately 2000-3500 pixels.
  • Save it to your file.
  • Start a new Illustrator document
  • File >Place your background image into the document.
  • Then right click on the layer and turn it into a 'Template'
  • Add a new layer
  • Consider the different shapes and areas you can trace in a full circle or full square. Visualize your image into layers of basic elements.
  • Title your layers by the items or areas you will section.
  • Draw the background.
  • We will add your creature to the background later.
Have fun, be creative with your fill, and adapt in meaningful ways that work with the image

Monday, January 18, 2016

Term 2 Check List

Illustrator Mesh Tool- 3D    /25

Picasso Cubism Research     /5

Photoshop Portrait 1- Picasso Multiple Perspectives     /20

Photoshop Portrait 2- Picasso Cubism      /25

Photoshop Portrait 3- Texture       /25

Photoshop Portrait 4- Monty Python       /10

Current Projects
Animation Exercises- [Classic Tween, Motion Tween, Shape Tween, Colour Effect, Scale Tween, Bouncing Effect] /10
Circle: Short Animation Project-      /25